 On the eve of the New Year, people try to decorate their home as comfortably as possible. And every year I want to do it in a new way. It is easy to do this without even buying up New Year's merchandise in stores. Decorations for the Christmas tree can be made with your own hands. It will turn out beautiful and original products even from ordinary cardboard. In addition, such jewelry can be given to someone, because gifts made by yourself are appreciated in a special way.
How to make a star for a Christmas tree from cardboard
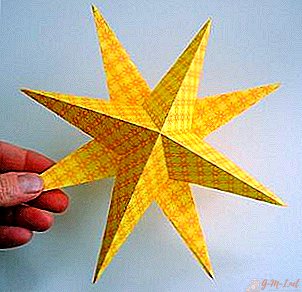
By tradition, the tree is decorated not only with balls, but also with stars. Especially often they decorate the top of the festive tree. Previously, a seven-pointed star symbolizing Bethlehem was put in this place. In the twentieth century, five-pointed ornaments of red color were massively used for these purposes, like stars on the towers of the Kremlin.
Such Christmas tree decorations are easy to make from cardboard, and then decorate them as soon as your heart desires. In addition to the classic version with a three-dimensional five-pointed star, you can make six, seven and eight-pointed.
What materials and tools will be needed
To make the star itself, you need to prepare:
- Thick paper or cardboard.
- Scissors.
- Glue.
- In some cases, for example, to make carved holes, a clerical knife is useful.
For decor items fit:
- Spangles.
- Paints.
- Beads.
- Rhinestones.
- Sequins.
- Lace.
- Foil.
- Twine.
Reference! You can immediately use decorative cardboard with a holographic or some kind of New Year's pattern. Then you can do without additional decor. It will also save time.
DIY cardboard star on Christmas tree: step by step
There are several ways to make cardboard stars. The simplest but most effective options for stars are presented below.
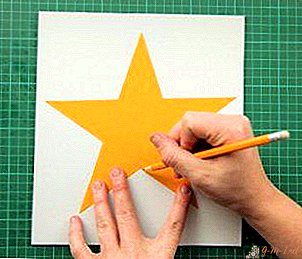
Flat
- For manufacturing, it is enough to cut out a star of any shape from thick cardboard.
- Then decorate it with colored paper, an old postcard, twine, ribbon.
Double
This is the easiest way to make a Christmas tree decoration.
- Draw on a cardboard a five-pointed star in two copies (it is easier to do this using a ready-made template printed on a printer). It will be more beautiful to use cardboard of two colors for this.
- Carefully cut workpieces with scissors or an office knife.
- Then you need to make a cut from the top to the middle of the star on one piece.
- Similarly, cut a line on the second workpiece, only from the bottom, also to the middle.
- Pass one blank into another through the slots.
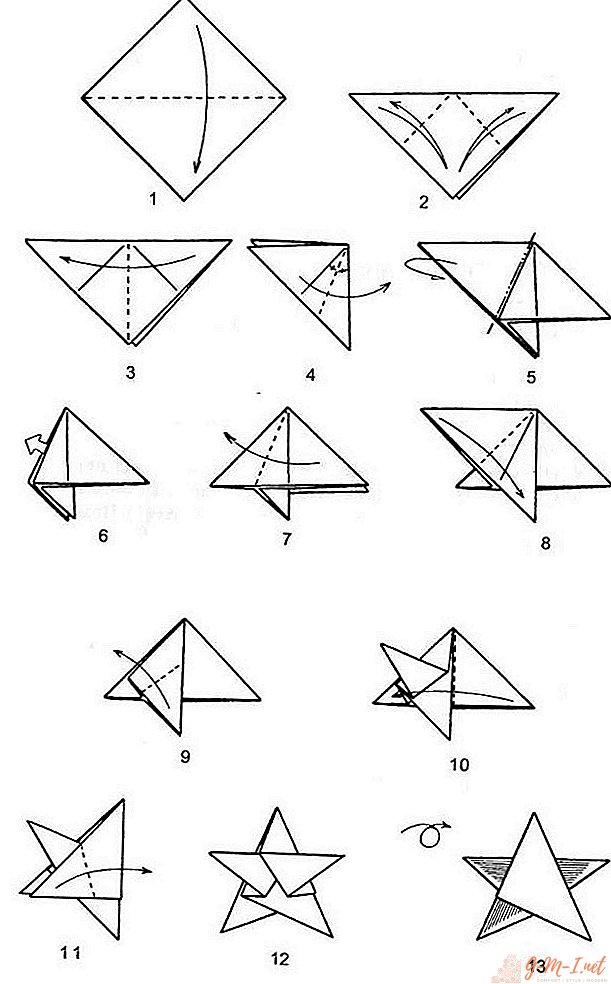

Volumetric
For this option, it is better to print a template taken from the Internet. Or you can manually draw a drawing. It should be a five-pointed star with segments for gluing on each side. You need two pieces of such patterns for the manufacture of one product.
- Each ray of the star must be bent in the middle to the center. So it will turn out to be voluminous.
- Do this with the other half.
- Glue them together using gluing places.
- Glue the rope on top of the product.
Reference! In order to be able to put such a star on top of the tree, you need to make a hole in the bottom of it, or glue a cardboard rolled up with a cone. By the way, this same option can be glued from individual rays.

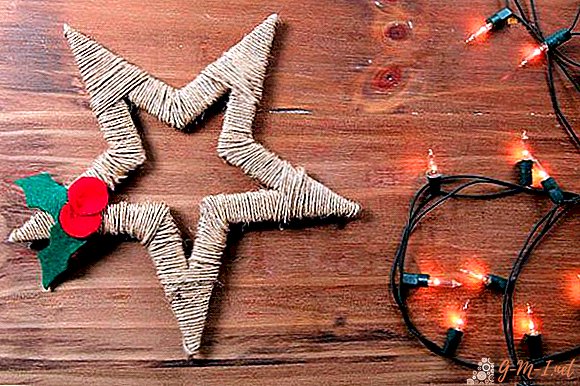
Flat of string
- You can draw a template by depicting a large star, but inside a small star or by taking the necessary option on the Internet.
- Cut the inside with a clerical knife.
- Glue the beginning of the twine to the workpiece and wrap it properly over the entire area.
- Gently tuck the tip of the cord in and glue it.
- Add decorative elements cut from felt or something else.
- Tie a ribbon so that you can hang the product on the Christmas tree.
Double compound
This option is a little more complicated than the previous one. For production, you need to print a template downloaded from the Internet. You can try to draw it by depicting a triangle with recesses on each side. There will be two such triangles.
- The triangle bends from three sides to the center.
- Two workpieces are interconnected by means of recesses.

Eight Point Surround
- You need to take a square of cardboard, fold in half to make a triangle. Then fold it in half, too.
- Expanding the cardboard, find four small squares formed by fold lines.
- Each square must be cut from four sides to the middle.
- Then fold these incised squares to the center so that you get a triangle (side of the finished star).
- Make another eight-pointed star in this way.
- Glue them together so that they form an eight-pointed.
From fabric
- A star of any shape and size is cut out of cardboard.
- The blank must be covered with cloth and stuffed with padding polyester.
- Decorate the product with beads, sequins, rhinestones, lace.

In the technique of quilling
For manufacturing, the most common corrugated cardboard is suitable.
- Measure out five strips of cardboard of the same size - 2.5 by 70 cm and one 2.5 by 9 cm.
- Twist the same stripes into curls, glue the tip.
- Next, you need to give the curls an eye shape: for this you need to squeeze them on both sides.
- Then, on the other two sides, you must also compress the workpieces. It should turn out to be an irregularly shaped rhombus (like a kite).
- Next, you need to glue these rhombuses together, so that the long sides stick out.
- In the center of the product you need to glue a tight curl of cardboard from a short strip.
- Decorate the item with ribbon.
Also in the quilling technique, there is another way to create an asterisk. Production on time will take about 20 minutes.
- You will need strips 1.5 cm wide: five long and five shorter.
- The strip is twisted at one end with a quilling tool or wooden skewer. But it is not necessary to tighten it completely, leaving a straight tip.
- Then you need to take another strip and stick on the inside to the curl. This should make a petal with a spiral inside.
- You need to make five such petals.
- Then glue them together with a wide part so that a star is obtained.
- It remains only to hang it on a tape.

Dressing
Any of the proposed options can be decorated at your discretion. Silver stars look very original - for this they just need to be glued with foil. Also, cardboard toys are perfectly decorated with decoupage. A simpler option: use old New Year's cards, a newspaper or even a musical score for pasting a product. Such Christmas tree toys are obtained in retro style. For a change, you can try to design the whole tree in this way.
Fans of brighter and sparkling Christmas tree decorations will like sparkles and rhinestones. Also, a variety of decorative buttons are suitable for this, which can be found in the store with goods for sewing or needlework.
Leave Your Comment