 Assembling a sliding wardrobe without involving specialists is a way to significantly save the family budget. Knowing a few simple rules will facilitate the task, which even those who have never done such work before can do it.
How to assemble a wardrobe
Before proceeding with the assembly of furniture with your own hands, you should unpack the structural elements and sort them into groups:
- bottom and top;
- side walls and internal partitions;
- shelves;
- compound shuhlyad;
- fittings.
ATTENTION! The back wall and doors at this stage are laid aside, since they take up a lot of space, and the turn will reach them only at the last stages of installation.
Fittings mean:
- fasteners: self-tapping screws, dowels, confirmative screws and / or minifixes (eccentric couplers);
- handles for shuhlyad and cabinet legs, if a particular model should have them;
- rod (pipe for trempels) with holders;
- guides for doors and shuhlyad;
- hangers;
- other small elements, if provided for by the features of the purchased cabinet model.
Necessary tools
Often, a hexagon is supplied with confirmations, with the help of which furniture is assembled. But this key is far from all that may be needed. Indeed, control measurements must be carried out with something, and the structural elements should be tapped so that they fit snugly against each other at the junction points with dowels. In order not to waste time then searching for the necessary tools, it is necessary to prepare:
- roulette wheel;
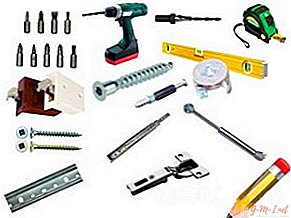
- level;
- drill;
- rubber and ordinary hammers;
- flat and Phillips screwdrivers;
- l-shaped hexagon.

The drill is useful at least when installing the rod. Using a rubber mallet, structural elements can be customized without fear of damaging their outer coating. If there is no such tool, you can use the usual one. But in this case, you need a shock-absorbing lining that prevents metal from contacting the laminate.
It is better to forget about the screwdriver during the assembly of large furniture: it will easily “miss”, screwing the screw deeper than necessary. And this can lead to a decrease in the strength of the entire structure due to the weakening of the attachment points.
Steps for assembling a sliding wardrobe
Such furniture is assembled on a bottom-up basis. After all, the heavier the part of the structure, the more difficult it is to lift it for installation on other elements.The second rule is that the assembly is only vertical. Some experts recommend assembling the cabinet on the floor, and only then lift and install it, but this method has many disadvantages:
- It is necessary to take into account the diagonal of the side wall: if it is equal to or greater than the height of the room, then it will not work to raise the compartment. The minimum difference is 5 cm.
- It is difficult to avoid distortions, because there is no way to identify them in time using the level.
- After lifting the structure, it is necessary to re-check and tighten all the fasteners, getting rid of the backlash.
The only advantage of this method is that you can cope with the task without outside help. But vertical assembly is easy to do alone if you know a few secrets and act in accordance with the instructions.
We assemble the lower part and the frame
 The first and most crucial stage of assembly of the cabinet is the correct connection of the bottom elements. This part differs from the cover by a large number of holes, some of which can be through. Another difference - places for fastenings are available on both planes of the workpiece. You can determine where the bottom side of the part is by looking at the cabinet diagram: holes in the area of the partitions indicate that it is the top.
There are three options for the execution of supports:
- legs
- basement;
- combined - a combination of the previous two.
Depending on what is provided for a particular coupe model, the mounting system may differ. The base is usually fixed with dowels and confirmations. In this case, the wooden plugs are first driven into the footboard, then the part is connected to the bottom, and only then screws are screwed.
The legs of the cabinet can also be mounted in different ways. If fixation by means of confirmations and self-tapping screws is provided, then first you need to screw in the central fastener, and then additional ones. In models with a combined support, the legs are first installed, after which the base is already mounted.
Install the sidewalls and internal partitions
 When the support is ready, the turn of the most time-consuming process comes, it is difficult for a novice master to cope alone. But there is a way. It is enough to look at the points of attachment of the sidewalls to the bottom. If the walls are placed above the base plate, then the assembly can begin according to the principle “from edge to edge”. If on the sides - the installation direction of the partitions and sidewalls will be from the center to the edge.
Having decided on the order of connection of the elements, two nearby (reference to the diagram) verticals and the corresponding shelves are laid out on the floor.
REFERENCE! If the furniture is of high quality, then it provides for a duplicate connection: dowels and confirmations or minifixes. So the cabinet is more durable, its shelves do not break at the fixation points under the weight of things.
Next, the dowels are driven into the sidewalls of the shelves, with the help of which then the verticals are connected - the sidewall and the partition or two partitions. At this stage, it is important not to confuse the front and rear ends. Simple to distinguish: the front has a decorative coating.
The resulting structure is lifted and set to the bottom. Shelves serve as spacers, eliminating the fall of partitions, so you can safely continue to assemble the cabinet without assistance. Subsequent work is carried out according to the same principle: dowel in a shelf, which is then to the partition and connected to the finished part of the structure.
The final stage is to achieve complete fit of parts with a rubber hammer and control fixation of attachment points with confirmations or minifixes.
Cabinet cover
 This part can be attached to the walls from above or from the side. In the first case, it is recommended to attach the connecting elements to the fastening points, then bring the sheet up and tighten the screws. The second option involves the reverse procedure: the cover is first installed in place, and then fixed with fasteners.
Before tightening the confirmations, using a tape measure, you should make sure that the cabinet frame is assembled correctly. To do this, measure both of its diagonals. If they are the same, then everything is fine. When one is bigger than the other, there is a skew that you must get rid of before fixing the lid. This is done simply: the cabinet is supported on the tilt side, after which all fasteners that are loose are pulled up.
Back wall
Depending on the size of the compartment, its back side may consist of one or more sheets of wood-fiber board. In the first case, everything is a little simpler: the fiberboard is fixed at the corners of the cabinet, and then attached to all its elements.
If the furniture is large, then the connecting plates are attached to the fiberboard sheets. In this case, it is recommended to carry out assembly from the bottom up. The bottom sheets are attached first, which are then fixed with a vertical bar. Then the upper fiberboard and horizontal connector.
IMPORTANT! The durability of the cabinet depends on the correct installation of the back wall. Therefore, do not save nails - the sheet is nailed to all partitions and shelves of the compartment.
Fasten the guides
The lower rail consists of two grooves for the movement of the rollers, the upper looks like a profile with a central divider. If they do not have holes for fasteners, then you have to make them yourself. In the lower rail they are located in the center, in the upper - in a checkerboard pattern.
IMPORTANT! When drilling, do not forget about the chamfer designed to deepen the screw head flush with the rest of the blade.
The upper bar is set so that its frontal part coincides with the front edge of the cabinet lid. When mounting the compartment lower from the edge of the slab, an offset of 10-15 mm is made. This is necessary in order to avoid skewing and ensure smooth running of the doors. Another point: before installing the lower guide, you must insert the stoppers in its gutters.
We fasten the doors of the closet
 This is one of the simplest and at the same time crucial stages: often the door leaf is made of expensive and fragile materials. Before you hang the doors, the sashes are unpacked and laid out in order to determine the order of their installation - it depends on the picture. Then the one that will be installed on the inner rail is taken, and inserted into the upper gutter. After that, the wheel is wrung out, and the door is fixed on the lower guide. Then the actions are repeated with the external ones and on this the assembly is completed.
Leave Your Comment